Step 1: Reset the printer+1-877-353-1149
Resetting the printer can resolve some types of slow printing issues.
- Turn the printer on, if it is not already on.
- Wait until the printer is idle and silent before you continue.
- With the printer turned on, disconnect the power cord from the rear of the printer.
- Unplug the power cord from the wall outlet.
- Wait at least 60 seconds.
- Plug the power cord back into the wall outlet.
NOTE:
HP recommends connecting the printer power cord directly to the wall outlet. - Reconnect the power cord to the rear of the printer.
- Turn on the printer, if it does not automatically turn on.
- Wait until the printer is idle and silent before you proceed.
Try to print. If the issue persists, continue to the next step.


Step 2: Check the print driver settings
Check the print driver settings. Selecting certain paper types or printing in Best quality can slow print speeds. Print with plain paper in Normal or Draft quality for faster print speeds.
- Search Windows for printers, and then click Devices and printers in the list of results.
- Double-click the icon for your printer.
- Double-click Set Preferences.
- Find the paper type information.
- In the Paper type area, make sure Plain Paper is selected.
- In the Quality Settings area, make sure Draft or Normal are selected.
- Click OK or Apply to confirm the changes, close the HP printer driver window, and then close the Devices and Printers window.
Try to print. If the issue persists, continue to the next step.


Step 3: Uninstall the print driver
Remove the print driver and software using the Uninstall a programming tool in Windows Programs and Features. Uninstalling the print driver allows you to install the latest driver version.
- If your printer connects to the computer with a USB cable, disconnect the cable from the printer.
- Search Windows for programs and features, and then click Programs and Features in the list of results.
- In the list of installed programs, click your HP printer name, and then click Uninstall or Yes.
- Follow the on-screen instructions to complete the software removal.
- Restart the computer.
Step 4: Reinstall the print driver
After uninstalling the print driver, go to 123.hp.com, and then follow the on-screen instructions to download and install the latest driver.
Try to print. If the issue persists, continue to the next step.
Step 5: Update the printer firmware
Download available firmware updates from the HP website
.
- Make sure the printer is on and connected to the computer, either through your local network or a USB cable.
- Go to HP Customer Support - Software and Driver Downloads.
- If a Let's identify your product to get started page displays, click Printer, type your printer model number, and then click Submit.The software results page for your printer displays with the default operating system selected.
- If you need to change the version of Windows, click Change, select your version, and then click Change.
- Click Firmware, and then click Download.If a Firmware section is not listed, an update is not currently available for your printer.
- Save the file to your computer.
- Locate and then open the file to start the installation process.
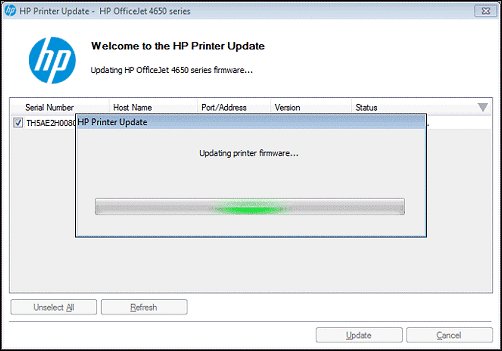
- When the HP Printer Update window opens, see if the printer serial number displays.
- If the serial number displays, select the checkbox next to it, and then click Update.
- If the serial number displays but the status is 'not applicable' (grayed out), you do not need to complete the firmware update. Click Cancel.
- If the serial number does not display and your printer uses a network connection, connect a USB cable to the printer and computer, wait 20 seconds, and then click Refresh. When the serial number displays, select the checkbox next to it, and then click Update.
- When the update completes, click OK.
- If you connected a USB cable to update your network printer, remove the USB driver installed by Windows.
- Search Windows for Devices and Printers, and then click Devices and Printers in the list of results.
- Right-click the USB printer device that matches your printer model, and then select Remove Device.
- Disconnect the USB cable from the printer and the computer, and then restart the computer.
Try to print. If the issue persists, continue to the next step.
Step 6: Check the network status (wired and wireless connections only)
If your printer is connected to a wired or wireless network, there are several tips that might resolve slow printing issues.
- On your computer, check the wireless signal strength by clicking the wireless connection icon in the Windows task bar. If the signal strength is low, move the router, computer, and printer closer together.
- Make sure there are no additional strains on your network, such as downloading or streaming services. Depending on your bandwidth, these activities can significantly affect print speed.
- If the printer is connected to the network with an Ethernet cable, make sure the cable connections are secure.


No comments:
Post a Comment